Monday, March 26, 2012

Potato Salad with a Twist

The unseasonably warm weather is gone and it's back to being chilly again... boo! I thought revamping a summertime favorite might be just what we needed to bring the sunshine back into our lives. What to make, what to make... Potato Salad? Sounded good to me; who doesn't like a scrumptious potato salad anyways?

Since it's cold again, I wanted to go for a warm salad rather than the norm of a chilled salad. I raided the fridge and found some ingredients, then it came to me... why not serve a hot potato salad with a mirepoix (carrots, onions, and celery)? Yum!

Ingredients (for 2 servings):
  • 7 baby potatoes, quartered
  • 1 carrot, peeled and chopped into bite-size pieces
  • 2 green onions, thinly sliced
  • 3 tablespoons of minced yellow onions,
  • 1/3 stalk of celery, thinly sliced
  • 3 tablespoons of mayo
  • Pinch: garlic salt, garlic powder, fresh ground pepper, vegetable seasoning, and plain salt
Directions:
  1. Add the quartered baby potatoes and chopped carrot into a pot of cold water, season with the plain salt and bring to a boil. Cook for 15 minutes or until fork tender
  2. While they are cooking, saute the minced yellow onion and sliced celery over med-low heat until translucent (about 2-3 minutes)
  3. In a small bowl, mix together the mayo, green onions, garlic salt, garlic powder, pepper, and vegetable seasoning
  4. Drain the potatoes and carrots and return to the hot pot
  5. Spoon in the sauteed celery and onions
  6. Gently toss the vegetables with the mayo mixture 
  7. Serve immediately (while warm)
The Mr. doesn't even like onions and after some cautious investigating he ended up eating the entire bowl. This turned out to be a great side dish and really used up some of the random veggie leftovers I had in the fridge (who can complain about that?) 

Have you ever created a spin-off recipe of a classic? I'd love some other suggestions :)

Sunday, March 25, 2012

No-Sew, Waterproof Placemats

If you hold even a five-minute conversation with me, you are bound to hear about my little munchkin, Aubergine. Aubs/Aubrey/Aubbie loves to play with makeup brushes, eat her mama's ice cream, and chase her papa around the house. She is such a little piggy when she eats though... water dribbles and food crumbles everywhere. Even so, she is just the sweetest little cuddlebug on four-legs you would ever meet. Oh wait, you thought Aubbie was our kid? Close! She's our itty-bitty kitty baby.

She is super duper cute though... I mean, just look at this face!

I'm not kidding about the messiness while she eats though. Aubs has some serious confusion between whether she is a sloppy toddler or a rambunctious puppy because she's always getting food all over her little area. It got so bad, we put a little rug down just to collect her scraps, but the spills went right through and her wet food would cling to the fibers when they dried. We definitely needed something new but I was having a problem finding one that coordinated with the rest of our decor (and didn't look too pet-themed) and was also durable enough for Aubs to dirty up.

So one day, after doing a quick one-through at the dollar store (you know you can't resist looking around either) I found some clear vinyl shelf paper and knew right away that it was a steal. In my previous life I taught preschool and clear vinyl was a mainstay in our crafts cabinet, so there was no doubt that I would find something to do with it. Turns out, my something was this adorable placemat for Aubrey.

This was so simple and took less than 30 minutes. Now we have a pretty mat for Aubs that not only looks nice but is also waterproof and cleans up in a jiffy.

Materials:
  • 1 Piece of scrap fabric, 11" x 17"
  • Coordinating trim or ribbon
  • 2 Pieces of clear vinyl shelf paper, 12" x 18" (generally comes in an 18" width which makes it even easier)
  • Tacky glue
Directions: Sorry -- the pictures just aren't uploading correctly, so I'll try to explain this tutorial as clearly as possible 
  1. Carefully peel the paper backing off of one piece of the vinyl and place it sticky side up
  2. Center the fabric, right side up, and apply it carefully to the vinyl
  3. Starting from the center, rub any air bubbles out with your fingers
  4. With the ribbons, create a framed inset inside the perimeter of the fabric and using a small dot of tacky glue, affix the ribbons together at each corner
  5. Gently peel back the paper on the second piece of vinyl and while centering it, apply it over the fabric and ribbon layers (sticky side down), being sure to overlap the edges of vinyl so that they stick to one another
  6. As before, start in the center and smooth out any air bubbles. At the edges, apply extra pressure to ensure that the pieces of vinyl have adhered to one another
  7. Trim the edges to form an equal border of between 1/4 and 1/2 of an inch and you're all set to lay it down for Fido.
 

What I like most about this is that while it's great for a pet because it's stain-resistant, washable, and CHEAP, you could easily create a number of them to use at your next barbecue or even some for the kids to use. Speaking of some for the kids... how cute would it be to use their artwork in place of the fabric? I'll have to save that idea for a few more years :)

Saturday, March 24, 2012

Book Page Banner

Our bedroom is bare. For one, it's huge (come on... is a sitting room in a bedroom really necessary??) and two, no one sees it except us. The latter is probably the biggest reason we haven't gotten around to decorating it, as we've primarily focused on the main floor where all of our visitors hang out. I've finally tackled the first DIY project for the room -- art for above our headboard.

I spent more time than necessary scoping out great options:
1: Monogram via; 2: Frames on a Curtain Rod via; 3: Song Lyrics on Canvas via; 4: Sweet Nothings on Wooden Planks via; 5: DIY Lighted Headboard via; 6: Toilet Paper Roll Art via

I ended up choosing none of the above because the Mr and I have a fear of something large falling off the wall and onto us while we're in bed... irrational or not, it could still happen and we are not taking the chance haha. What I did choose was something similar to this, which I found on the oh so awesome WeddingChicks.com site.

I love the handmade vintage look, but the simplicity of it is what really drew me in. As you can guess, this was a really easy project, but it makes quite an impact.


Materials:
  • An old book -- I got one from the dollar store
  • A length of twine/rope/yarn
  • 3 feet of lace ribbon, cut in half
  • Clothespins
  • Hot glue, optional

Tools:
  • Rotary cutter or exacto knife
  • Printer, with ink of course
  • Ruler
  • Hot glue gun, optional

Directions:
  1. Start by cutting one page from the book using the rotary cutter or exacto knife, getting as close to the binding as possible 
  2. Measure this sheet and input the page size into MS Word (or the program of your choice)
  3. Decide what you want your banner to say... for example love, dream, happy, amor, goodnight, bedtime, etc.
  4. Experiment with different fonts and sizes until you are happy with the result (be sure that only one letter appears on each page)
  5. Cut the correct amount of pages from the book so that you will have enough to spell out the word you chose
  6. Load the cut book pages into your printer and print
  7. Lay the pages on a flat surface to spell out your word
  8. Cut a piece of twine/rope/string/yarn/etc that is about 1 1/2 times the length of your word
  9. Fold the string in half and use a clothespin to attach the middle letter to the string
  10. Working out on each side, attach the letters in equal increments
    • Optional: Once you've attached the letters, go back with a dab of hot glue to affix the pages permanently to the clothespins
  11. Use a piece of lace ribbon on each side to tie a bow to the ends of the string
  12. Hang and enjoy


Monday, March 19, 2012

Nutella Cheesecake Raspberry Poppers


I picked up a pack of raspberries on Thursday night and just got around to using them. I had considered making a raspberry cheesecake, but seeing as we have ½ an ice cream cake sitting in our freezer, I thought something a bit more petite would be a better choice. I soon came across some cute raspberries stuffed with chocolate chips (1 in each) and I thought, “that looks fantastic but let’s go one step further.”

That’s when I came up with stuffing raspberries with nutella cheesecake... My mouth waters just thinking about it, tee-hee. What’s even better is that my recipe calls for only three ingredients (4 if you want to go above and beyond) and all of only 15 minutes to prepare. I promise that the platter will be cleared faster than that! These are perfect treats for little fingers, yourself or even a simple cupcake garnish.

Ingredients:
  • 4 oz (half a package) Neufchatel / Cream Cheese, room temp
  • 1 heaping tablespoon Nutella, room temp
  • 1 pack of raspberries, cleaned & dried
  • Mini chocolate chips, 1 for each raspberry (optional)


Directions:
  1. Stir in the Nutella with the cream cheese until smooth
  2. Pack the cheesecake mixture into a pastry bag with a fancy tip
    • I used a quart-sized Ziploc freezer bag, cut a small hole in the corner and inserted the tip combo and voila! 
  3. Put the bag into the freezer and let chill for 5-10 minutes
  4. Squeeze a dollop of the cheesecake mixture into the center of each raspberry
  5. Place a single mini chocolate chip onto the top of each raspberry

Sunday, March 18, 2012

I'm A Cover Girl!

Well, it's been hard not letting it out into the public forum for the past few months, but the Mr. and I are in Real Simple's April issue!!!
Yes, you read that right. My crafty haven was redecorated by Real Simple's talented organizational/design team. It is UH-MAY-ZING. In all seriousness it is the most beautiful room I have ever seen and what's better is that each and every item in my 10'x10' space serves a purpose. I'm so grateful that Real Simple chose to give me this wonderful opportunity because I never could have dreamed up the ideas that they had, nor would my budget allow for such a transformation.

My Top 5 Splurges

One of a Kind Vintage Chair - $650 from Chairloom -  Similar Styles Here
The pattern and design of this reupholstered seat is none like I have ever seen before and it's so comfortable! I love sitting there while I'm coming up with new craft ideas or doing some research on my laptop.

Model 1 Radio - $150 at Tivoli Audio - Found Here
The Mr. couldn't agree more and loves showing it off. The sound is impeccable and the design is minimal yet sophisticated.

Handmade Bulletin Board - Fabric: $196/yd at Lee Jofa - Found Here
Chip Cordelli (my organizer-extraordinaire!) made this bulletin board for me out of some really fantastic fabric wrapped around hardware store homasote. I wish I had another office just so I could make one myself!

Super Jumbo Naked Trunk - $313 at Wayfair.com -  Similar Style Here
Another great idea from Mr. Cordelli -- A gift wrap central set in a trunk. Tension rods act as ribbon organizers and clear shoe boxes house ribbons, tags, cards and calligraphy pens. Besides it's ultimate purpose, I've been obsessed with steamer trunks for the past few years so I love having this really modern alternative.

Fallon Rug by Jill Rosenwald for Surya - $385 at Rugs USA - Similar Style Here
I love a nice rug and this is nice times a billion. When we first bought our house 7 months ago, I had wanted a geometric patterned rug for down in the living room. The Mr. hadn't entertained that idea very long (boohoo) so when Real Simple presented this as an option for above the wall-to-wall carpeting in the room, I was elated. It's beautiful and vivid, yet very subtle in the entire room. 

Go out and grab the $4.99 issue to enjoy all the goodness between the two covers... you won't be disappointed! I'd love to hear what YOUR favorite pieces/ideas are.

Saturday, March 17, 2012

That's So Cheesy

Before I get to the cheesy part, I want to mention that yesterday was my sweetheart's birthday! I'm so sad that it's over already; I just love having the freedom to spoil him like he deserves. We spent the evening in the city and had dinner and drinks at Fogo de Chao (awesome restaurant if you have a meat-lover in your circle). Before heading down, he got to open the presents that he was left to ogle over all day while I was at work (tee-hee!).  If I had to guess the Mr.'s favorite gifts from last night -- the bean bag toss game to round out his outdoor game collection, the Legend of Zelda blanket that I made especially for him, and the vertical chess board set which brings a whole new meaning to the "art of chess." If you've never heard of Straight-Up Chess, I seriously recommend that you check it out... the product is innovative, the quality is impeccable, and the customer service is outstanding. (I'll take a good picture of his tomorrow when the sun is out again)

Now, on to the cheesiness (yeah!!).... Yesterday went by too quickly, so today was time to celebrate over lunch with his parents. Since my in-laws have never enjoyed any type of fondue, we thought it would be a great communal birthday meal. The main course was a variation of the Coq au Vin recipe found in the Melting Pot's cookbook and served with raw bite-sized marinated meats (rosemary chicken and a savory filet mignon), organic P&D shrimp, and veggies (carrots and baby potatoes). While it was absolutely delicious, my take on the classic cheese fondue was the show stopper in my mind at least. After all, what's not to love about cheese and wait for it........................................................................ champagne? Yeah, nothing. That's what I thought.


CHEESY CHAMPAGNE FONDUE
Ingredients:

  • 8 oz Shredded Gruyere
  • 8 oz Shredded Emmentaler or Fontina
  • 1 1/4 cups brut champagne (dry!)
  • 2 Tablespoons snipped green onions
  • 1 clove of garlic, peeled and cut in half
  • 1 loaf of fresh, crusty bread, cubed (I used Wegman's Garlic Tuscan Bread... YUM!)

Directions:

  1. Rub the garlic cloves along the inside of the fondue pot
  2. Heat the pot to medium and pour in the champagne
  3. Let the champagne warm up, then stir in the cheeses until they cook together and are smooth (depending on your pot this could be as fast as a minute, or as long as 15 minutes)
  4. Stir in the little snippets of green onion and turn the heat to low
  5. Serve with the bread cubes on fondue forks and enjoy

Wednesday, March 14, 2012

Happy Pi(e) Day!

So how many of you knew today was an unofficial holiday? I actually almost missed it but Real Simple's Simply Stated Blog could never let that happen. It's Pi Day... 3.14! Oh wait... pie, not pie? Well, I would much rather it be Pie Day, how about you?

In honor of 3.141592653589793238 let's honor my favorite pie recipes!


To get us started...


Favorite old-fashioned pie? Strawberry Rhubarb Pie (this reminds me of my Grandmother <3)
Source: Woman's Day

Favorite go-to pie? Crunchy Caramel Apple Pie - This is a fall staple in our home
Source: Family Fun

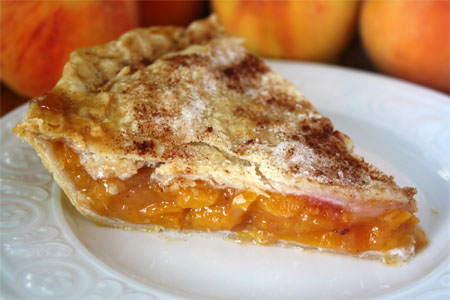
Favorite down-home pie? Peach Pie - This screams summertime to me!
Source: Skip to My Lou

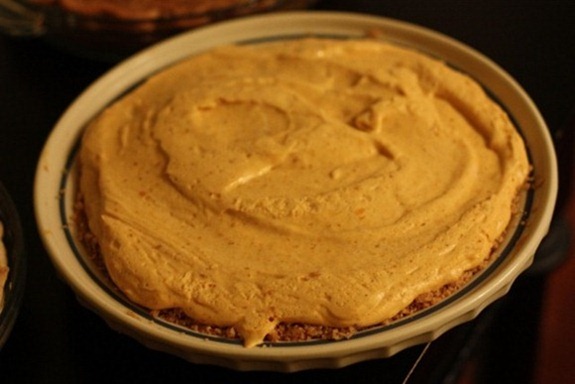
Favorite remake of a classic pie? Pumpkin Chiffon Pie - What's better than pumpkin pie? Pumpkin chiffon pie of course!
Source: Kath Eats Real Food

Favorite porta-pie? Pie Pops - Haven't made these just yet, but these are brilliant!
Source: Our Best Bites


And we all know that pies aren't just sweet...

Favorite side-dish pie? Spanakopita (Spinach Pie) - One word: delicious.
Source: Martha Stewart

Favorite savory brunch pie? Broccoli, Ham & Cheese Quiche - My mother hates omelettes, but she sure does love some quiche; this is for her.
Source: The Examiner

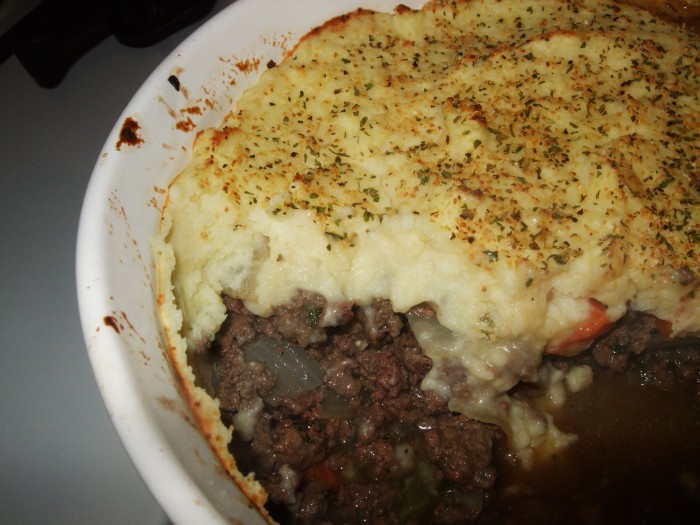
Favorite make-it-a-meal pie? Venison Shepherd's Pie - My own recipe to use up some venison.
Source: Spool & Spoon (me!)


Thursday, March 8, 2012

Chicken Cordon Bleu Fingers

I routinely try and create new recipes (sometimes to the Mr.'s dismay... oops). Tonight's creation was a success though: chicken fingers, cordon bleu style. Mmmm. One of the things I like most about my version is that it is 100% pre-cooked so there is no messy raw meat sitting around which keeps things so much more sanitary during the preparation.


Ingredients:
  • 1/2 lb of sliced cooked chicken (deli meat)
  • 1/2 lb of thinly sliced high quality swiss cheese
  • 1 boneless ham steak
  • 1 egg
  • 1/3 cup of milk
  • 1 cup of flour (
  • 1 tablespoon of Montreal chicken seasoning
  • 1 1/2 cups of panko bread crumbs
  • 1/4 cup of shredded asiago
  • 1/2 teaspoon of garlic salt
Directions
  1. Preheat oven to 400 degrees
  2. Mix the chicken seasoning into the flower in a shallow dish; blend milk and egg in another dish; mix garlic salt, asiago, and bread crumbs in another dish
  3. Slice ham steak into 1/2 - 3/4 inch strips
  4. Lay ham across one slice of swiss cheese and roll up
  5. Layer two slices of chicken and lay the cheese/ham roll at one end
  6. Roll the chicken layer around the ham/cheese section
  7. Lightly dust the roll ups with the seasoned flour
  8. Coat each with the egg mixture
  9. Dip and coat the roll-ups in the breadcrumbs
  10. Place on greased cookie sheet
  11. Bake for 15 minutes (flip after 10 to cook evenly)
Enjoy while they're all warm and gooey! Mmm!

Makes 4 servings (2 each). Would also make great appetizers if you cut the finished product into quarters and skewered them with a toothpick!

Saturday, March 3, 2012

Birth Announcement Wall Art


I'm excited to be a mom one day (afterall, I do have a "Future Babies" Pinterest board) but right now, it's a lot more fun to be an Auntie. Our circle has welcomed in quite a few babies in the last couple of months and there are still 4 more on the way! My work bestie is the newest Mama I know and I could not be more excited. The Mr. and I are going tomorrow afternoon to visit the happy family and meet the little guy. I already made a blanket/play mat for him, but I thought that something personalized  would be a good bet now that he has arrived.

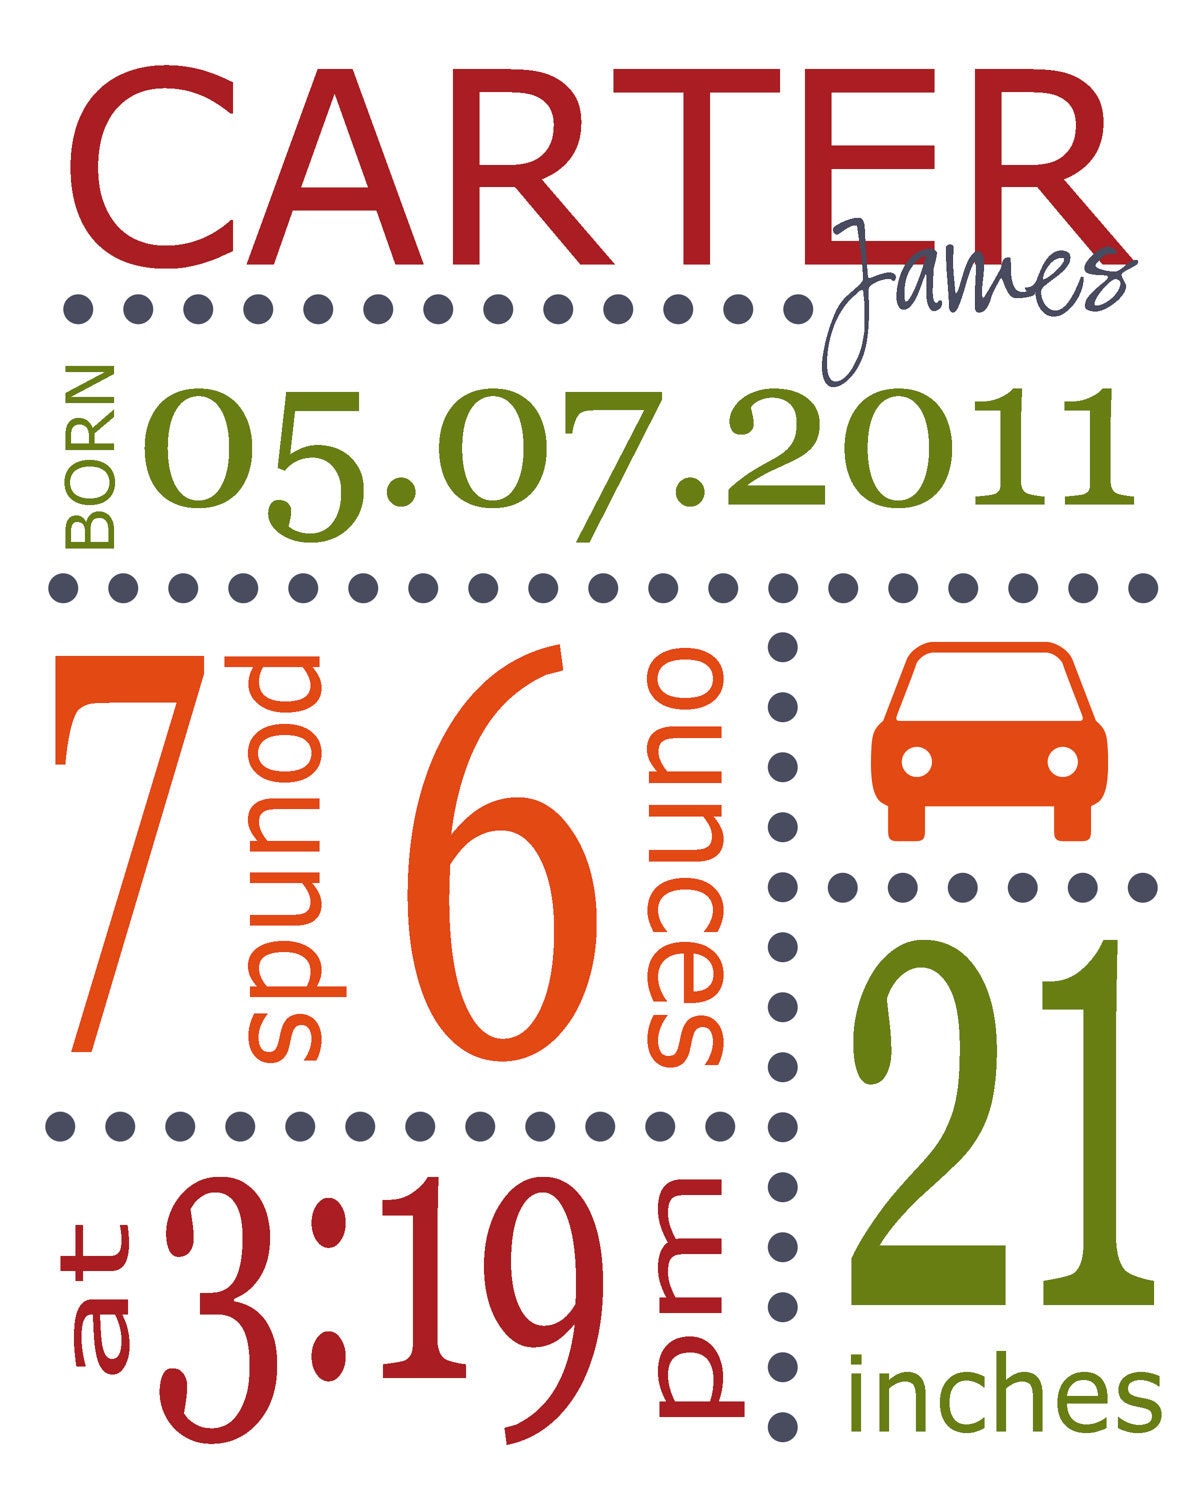
After scouring the web for something sweet, I found this birth announcement art on Etsy:
I was totally ready to buy it but I realized, there were no images that fit the theme of his nursery... womp womp. Then I figured, seriously, how hard could this be to make?!
Turns out, not that hard at all. I ended up using PowerPoint (I'm weird, I know) and I think my version came out adorable!
While there would have been more creative freedom in PhotoShop, PowerPoint was not that difficult and allowed me to do everything that I needed to do. It took about 2 hours* and was only a matter of:
  • figuring out what information to include (first name, middle name, last name, birthdate, weight, length, location)
  • what color scheme to use (varied blues and brown -- nursery colors)
  • creating an appealing layout (all horizontal, but different sizes and used an 8x10 canvas)
  • using a font that fit (this was probably what took the longest because I have hundreds of fonts)
*It probably would have taken an hour or less; however, we were watching Usual Suspects and it was after 11pm

After taking Aubrey to the vet this morning, I printed it on brown craft paper and used a simple frame. Finished product?

Thursday, March 1, 2012

Quotation Scarf

It's the first day of March which means Spring is only right around the corner, YAY! I decided a new scarf was in my future and when I saw this pin on Pinterest earlier this week I fell head over heels <3

I resolved to make it before the week was through and considering that materials were minimal, it was easy to do. I stopped by A.C. Moore and found a white pashmina for all of $4.19 ($6.99 - $2.80... 40% off coupon!). While the original used fabric paint I opted for a king-size black Sharpie to get a sketchier look (I didn't like the glossy finish of the original).

I started by figuring out what I wanted to write, I chose my favorite quote from my favorite novel: "I'm glad it's a girl. And I hope she'll be a fool -- that's the best thing a girl can be in this world, a beautiful little fool." Any guesses? It's Daisy Buchanan from The Great Gatsby by F. Scott Fitzgerald.

Next, I wrote it out neatly on the scarf...

And then to make it a little less "perfect" I went over everything to make them a bit bolder and messier...

I can't wait to wear it tomorrow!
Related Posts Plugin for WordPress, Blogger...