
Ahhh, do you have any idea how much I love my camera? The only issue I have is that I'm way overprotective of it. I am so flipping paranoid that I refuse to bring it out of the house for fear it will get damaged or worst yet, stolen. My solution? A pretty, economical, functional, and undercover camera bag.

You see, most camera bags are ridiculously expensive, not my taste at all, or so obviously carrying a very expensive piece of creative equipment. I wanted something that reflected my style, protected my beloved Canon, had room for accessories, but could easily pass for a classic handbag. I'm pretty sure that this bag hit all of the bases.
MATERIALS
Cheap-o purse (I got one for $20 from the clearance section of Target) -- you'll want it to have one main internal pocket, a large zippered opening, and a flat base.
1.5 yards of coordinating fabric
1.5 yards of 3/4 inch foam
1 piece of foam board / cardboard
Tacky glue
Camera and accessories
Sewing essentials (thread, pins, sewing machine, scissors, cutting mat, etc.)
INSTRUCTIONS
1. In order to reinforce the bottom of the bag, trace it onto cardboard and cut the rectangle out.

2. Cut out the same size piece of foam. Use tacky glue to adhere the foam and cardboard together.

3. Rather than do a singular circular insert with velcro sections and whatnot, I wanted to do individual custom inserts. The size of these pieces will vary depending on the bag's measurements, your camera, and the various accessories you'll be using. Cut out the pieces of foam using the following method to decide what sizes to use:
(Height of bag - 2 inches) x (perimeter of each accessory + 1 inch)
For example: my bag was 9 inches tall so the width was 7 inches. My lens' circumference was 8 inches, so the length was 9inches.
4. After your foam has been cut, you'll then cut out the fabric. For the fabric, use this formula:
((2 x width) + 1.25 inches) x (Length + 2 inches)
Using the lens piece as an example: the width was 17.25 inches and the length was 11 inches.

5. Fold the fabric "like a hot dog" with the right sides together. Stitch down the open seam with 1/2 inch seam allowance.

6. Flip right side out and maneuver the bottom cardboard/foam piece into the center of the sleeve. Make sure to have the seam on the bottom.

7. Fold the ends in, like a present. Using tacky glue or a slip stitch, seal the ends shut.

8. Place the bottom piece directly into your bag. This will give it structure and cushion but also an immediate pop of interest.

9. Repeat steps FIVE and SIX for each of the insert pieces. Instead of doing invisible seams, fold the pieces in half and pin the ends together.

10. Stitch as close to where the foam ends in each sleeve. Cut off any excess fabric.

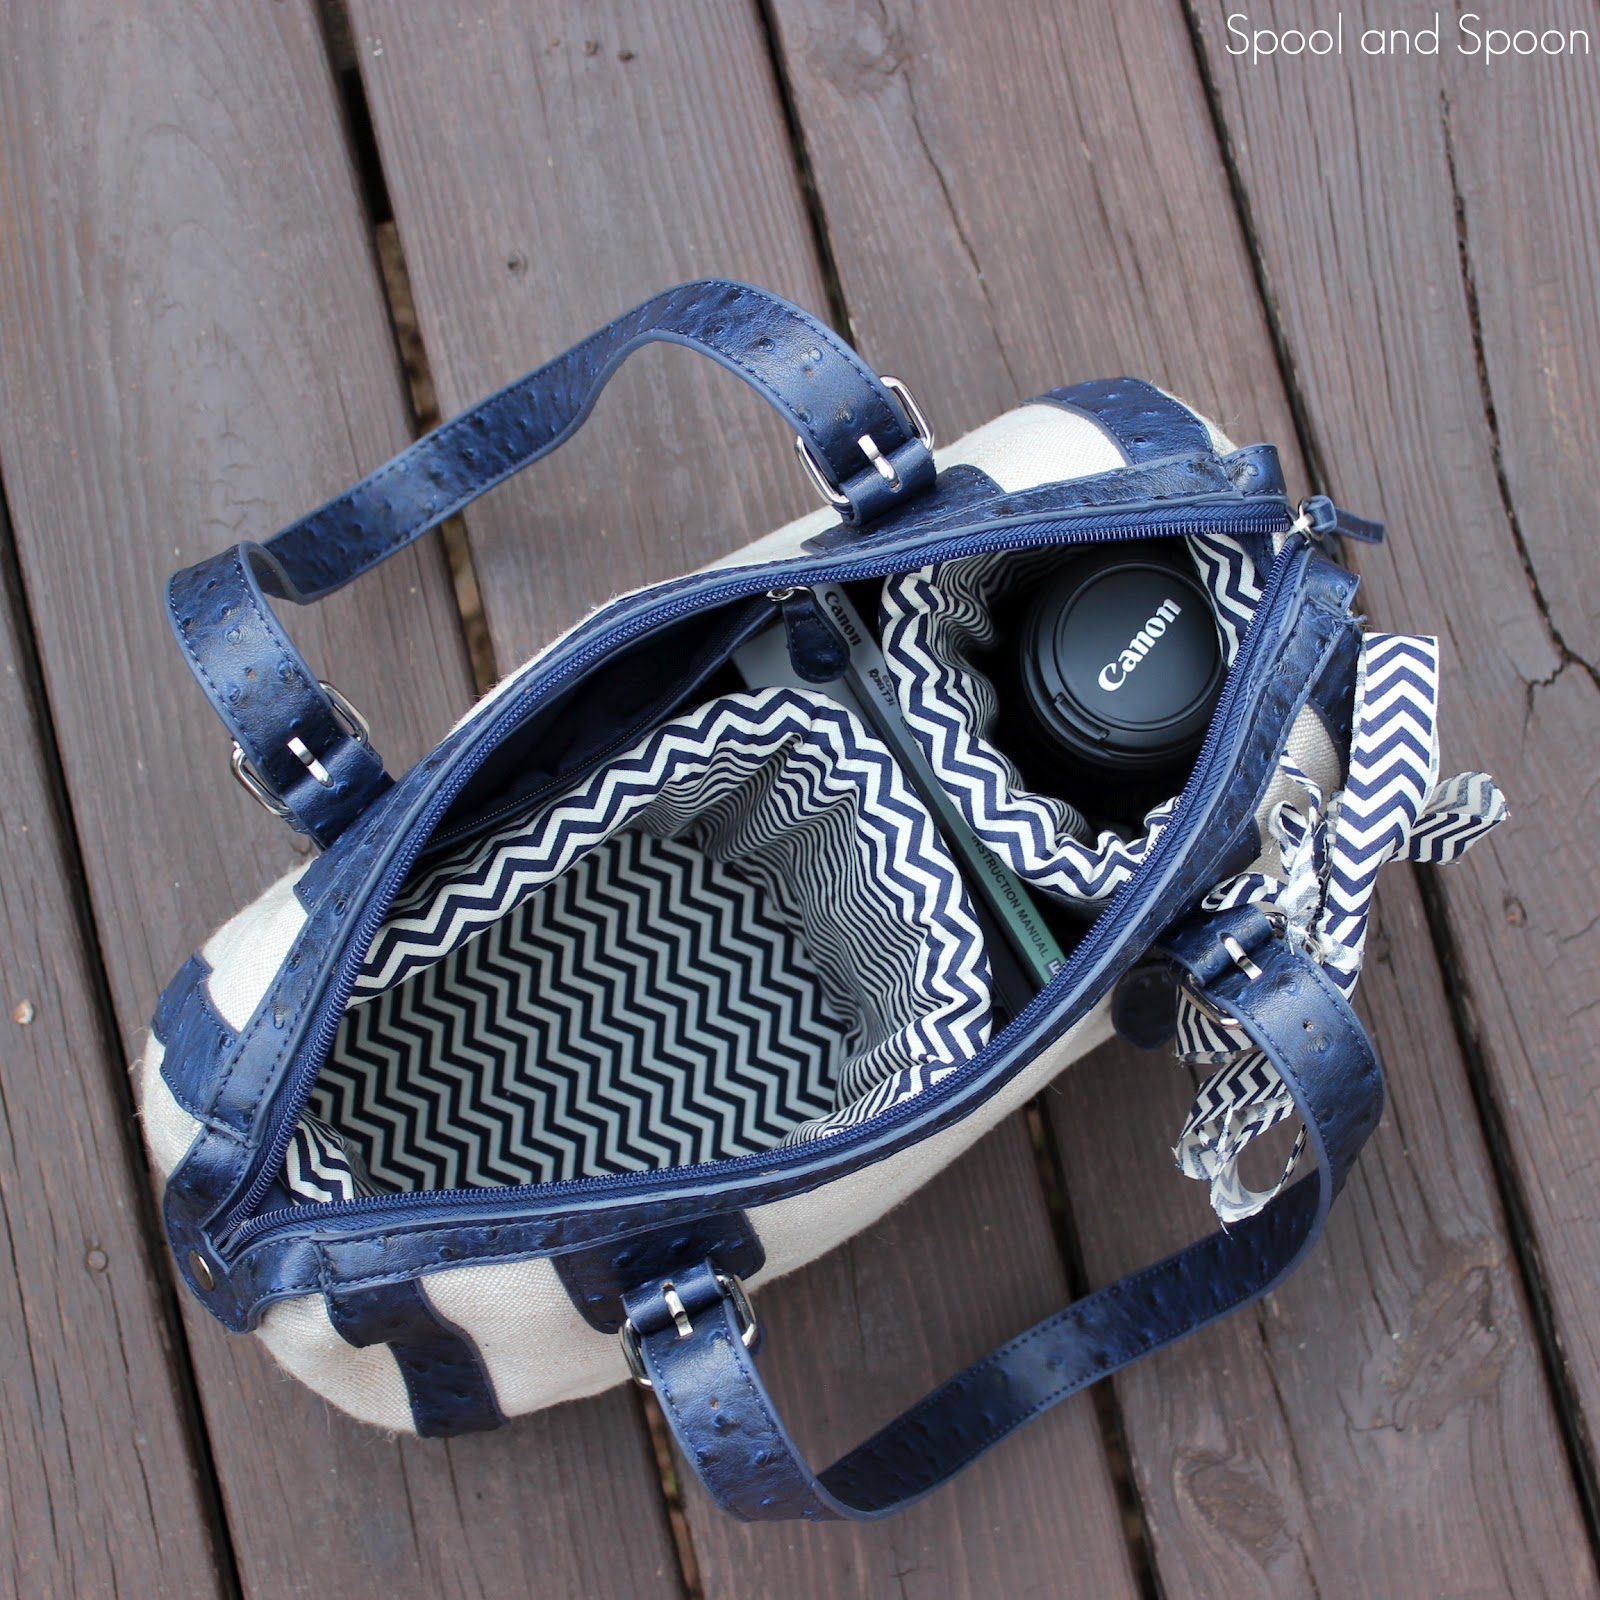
11. Flip the inserts around so the seam is hidden on the inside and place them in your bag. Stick in all of your fun camera stuff or anything else you might need. I have my camera, remote, manual, extra lens, cords, chap stick, wallet, etc. all shoved inside.

I purposely left the zippered pockets accessible so I have a place to stash my keys, bobby pins, etc.


What's nice is that if you would ever want to transition this back to a handbag, just pull out all of the inserts. Yep, that simple. You could also use the same method to turn a large bag into a diaper bag. Ideas, ideas!
If you liked this project, I'd be delighted if you'd consider following Spool and Spoon via email or through Google Friend Connect; there are plenty of other simple tutorials and mouth-watering recipes for you to discover! Also, did you know Spool and Spoon has a Facebook? Hop on over so you don't miss any of the fun.
I'm linking to:
What I cute idea! I should have thought of that earlier. On our last trip we carried around the camera in a really hideous, touristy camera bag (my husband insisted on buying it to protect his "baby") - we might as well have carried around a big sign: "Yes, we're tourists, and we have no fashion-sense whatsoever!" Well, next time I'll be prepared!
ReplyDeleteOh my gosh! I love this! I've been using an old camera bag of my husband's and my camera only fits in it so-so and it looks like a camera bag and this is so much cuter! Thanks for the great turtorial!
ReplyDeleteI'm so flattered you like it. I know what you mean though; it's so hard to find a bag that is lady-like, custom, and perfect for carrying just about anything. If you make one, I'd love to see what you come up with!
DeleteThat is forsure awesome! I have a bag almost identical to the one you used excepted it is totally burgundy leather...I have been wondering what to do with it and almost cut it up for the leather and buckles to make a different bag altogether....now I can make a bag for my old camera...and then learn how to use the dang thing...I would love to use it while I'm on my walk abouts and take pictures. It's a camera that one of my daughter bought when she thought she would like to take pictures so before she sold it online, I grabbed it from her because I really want to learn how to use it. It is a Yuashica FRI whatever that means, plus there is an extra lens. What do you think? is it too old to learn with?
ReplyDeleteThis is absolutely brilliant. Great tutorial, I have been needing a new bag to fit all of the different sized things I want to carry. :D
ReplyDeleteMegan
earthcolored.blogspot.com
This is amazing! I just pinned it and I will totally be making this!
ReplyDelete