Showing posts with label wood. Show all posts

Monday, February 3, 2014

Easy Carved Wood Art - DIY Gift Idea

If you follow me on Pinterest, you know that I can't get enough of Valentine's Day lately. Despite my fervor for all things pink and red, I've been meaning to incorporate some more design conscious items into our holiday decor. How about a rustic and neutral piece of Valentine art? 


This mock wood carving would be an incredible Valentine's Day gift for your special someone but also for the lovey-dovey newlyweds in your life.

Wednesday, September 4, 2013

DIY Wooden Tribal Necklace

Sometimes I forget that I'm not as young and hip as I think I am. Today is all about me venturing over to the wild side. You, too, can unleash your inner animal with this DIY tribal necklace!

Saturday, May 11, 2013

DIY - Wooden Plank Welcome Mat

Spending time outside is one of my absolute favorite things. I love nature and I'm lucky to be married to someone who is as equally enamored as I. Since we live in a townhouse surrounded by "communal" property, I wanted to make something to dress up our front porch for the Outdoor/Yard challenge at SYTYC. I've been drooling over wooden door mats for awhile now but had yet to find one in my price range that could stand up to the elements and look good doing it. That's when the glorious idea came to me -- make your own - and that is how this glorious Wooden Plank Welcome Mat came to be. {Unfortunately, I was a couple of votes short last week and got eliminated from SYTYC but I wanted share this wooden goodness with all of you!}


I got to pull out a few fun tools for this that I rarely use which was pretty exciting. I sort of felt like Superwoman... until I chickened out and asked the Mr. to help with the saw because I like all of my fingers and toes just the way they are.

Wednesday, May 1, 2013

DIY Dog Silhouette Coasters

We adopted Quinn almost a year ago this week (May 4th) and she is such an important part of our lives. When a rep from her rescue approached me about making something for their online auction, I was only too glad to oblige. I tossed around a few doggy themed ideas (like my no-sew waterproof placemats) and finally settled on crafting up some unique coasters.


I wanted to appeal to a wide variety of dog lovers so rather than picking one breed, I went with a variety. Plus, Quinn is a bit of a mutt (Beagle & German Shepherd mix) so it only felt right to go that route in support of the other pups out there. The silhouettes I chose were: dachshund, Boston terrier, German shepherd, pug, beagle, and boxer.

Thursday, April 11, 2013

Spring Mantle Reveal

Maybe you recall seeing some sneak peeks of our newly redecorated mantle in my Instagram feed or on this week's Insta Replay Monday


I'm so excited that it is finally done. I wish I had some before pictures, but I didn't plan ahead and took all of our old stuff down as soon as the Mr. gave me the green light. If you're really curious as to what was up there before, think ships and globes... BLEH -- blame the Mr.! That's not our style at all, we're much more green than that. When I finally got the go ahead to restyle everything, I knew I would be bringing the outdoors in. 

Saturday, February 16, 2013

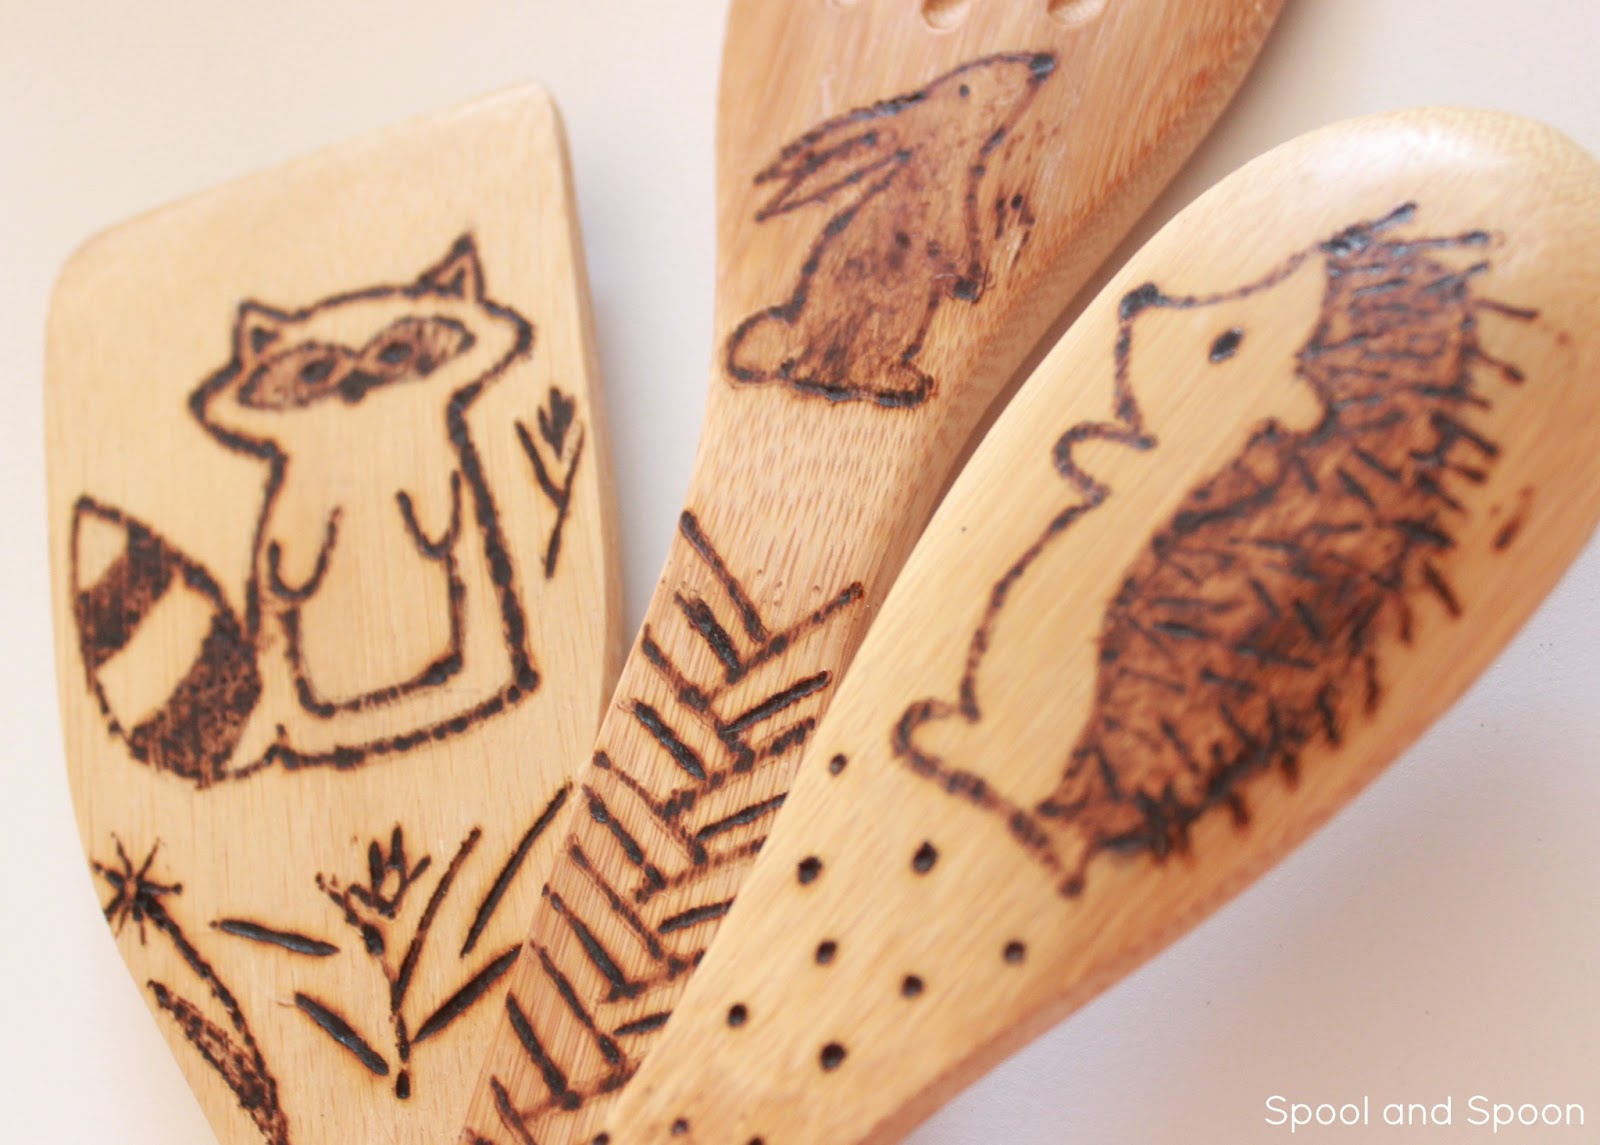
Woodland Spoons

I made these little babies over the weekend and they are sort of my favorite. Decorated cooking tools are always so eye catching to me but it's not like you can just paint onto something that will be in regular contact with food so what can you do? If it's wood, you can carve or burn it in. Since I have no idea how to whittle wood, I went with the latter.

Wednesday, November 21, 2012

Snow Globe Shadow Box Tutorial

So far, this is definitely my favorite tutorial of The 25 Projects of Christmas. Maybe it's not just a coincidence that these Snow Globe Shadow Boxes happen to be my lucky number eight! It's vintage-y, pretty, wintery, and cute. Really, there is nothing you won't love about these. 


If you're around these parts often, you probably realized that I prefer very traditional and rustic decor at Christmastime and these are not that at all. Still, I adore them. The boxes turned out so whimsical and retro due in major part to the color scheme. I was inspired by the layout of Cocalores and I must say, Anja knows what she's doing with the blue and pink combo because it worked like a charm.  Read on for the full tutorial!

Sunday, June 17, 2012

Stars & Stripes: Wooden Flag Art

Last weekend as I was browsing HomeGoods, I found the cutest gnome ever tucked on a random shelf. As I eagerly scooped him up, I noticed a distressed patriotic frame on the lower shelf. It was perfect for the summer holidays with it's flag motif but I had no use for yet another frame especially one that I probably wouldn't use so I walked away. Later on that night, I ran across this Painted American Flag at Pottery Barn and figured it was a sign from above; both pieces served as the inspiration for my first Stars and Stripes project for the 4th of July: Wooden Flag Art.


Materials:
  • Finished Wood Slab (I used a 6"x8"x1" cutting board. But if you want to replicate the monumental size of the PB piece, just use something larger)
  • Painters Tape
  • Rotary Cutter
  • Acrylic Paint (Plaid's Satin Cream, Crimson, Barn Red, and Too Blue)
  • 1" Bristle Brush or Sponge Brush
  • Sand Paper
  • Star Stickers
  • Sepia Decoupage Finish


Procedure:
1. Sand lightly and then coat with 2-3 coats of cream paint; allow brush strokes to show

 2. Cut painters tape to cover all areas that need to remain white (the stripes and the top left portion for the stars). We only had 2" painters tape handy so I cut the strips 2/3 of an inch wide with my rotary cutter for the stripes. For the stars area, I overlapped tape to form a 3" x 3.5" rectangle.

3. Cover the areas as shown below. Apply firmly, but do not press too hard, you actually want the paint to bleed a little bit.

4. Mix the two reds in equal parts and paint all of the exposed areas

5. Remove tape and apply star stickers. (Don't count mine... I definitely couldn't fit 50 on there)

6. Affix the tape to create boundaries for the blue paint. Apply the blue in 2-3 coats.

7. After the paint has dried, remove the star stickers. Don't worry when it gets a little messy, that's exactly what you want. Tip: Use tweezers! (If you though applying them was the time-consuming part, this trumps that easily. This took forever -- You can see all of the teeny tiny pieces of stickers in the back and only 5 came off in one full piece.)

8. Use sandpaper to distress the edges and finish. This is optional but I think it made all the difference.

9. If the colors are too bright for you (they were for me), add a coat of sepia decoupage finish. It dulls the colors and "dirties" it up just right.

Here it is on display in my craft room with other red, white, and blue goodness.

Like what you see? Consider following Spool and Spoon via Google Friend Connect or by email.

I'm linking to:
Related Posts Plugin for WordPress, Blogger...